

This how-to describes process of getting files from your local PC to service.unece.org using Repositories and Pipelines. Should be reffered to typically when a new version of UN/EDIFACT, UN/LOCODE or other deliverable hosted on service.unece.org is produced and needs to be published.
Terms
Local Repository - Folders and files on your Local PC,
Remote Repository - Folders and files on remote Server, these files are used by Pipeline
Clone - Process of copying files from the Remote Repository to the Local Repository
Commit - Finalazing a change in files, should contain commed describing reason of the change
Push - Process of moving changes from Local Repository to Remote Repository, One Push can contain multiple commits
Pipeline - Automated process for moving files between environments (typicaly Remote Repository → Stage → Production)
Stage - Staging / Testing / Quality Assurance (QA) environemnt, serves for final validation of files before moving them into Production environemtn (service-qa.unece.org)
Production - Production environment, final destination of our files (service.unece.org)
(not covered, Pull, Pull-request, Branch, Merge, another billion of Git's features etc. ...)
Diagram
Simplified diagram of the whole process:

Resources
Repository Web interface
- UNECE Bitbucket - https://bitbucket.unece.org
- Trade Repositories - https://bitbucket.unece.org/projects/TRADE
- UN/CEFACT (BRS, CCL, Codelists, Recommendations, RSM, XML Schemas, etc. ) - https://bitbucket.unece.org/projects/TRADE/repos/uncefactservice/browse
- UN/LOCODE - https://bitbucket.unece.org/projects/TRADE/repos/locodeservice/browse
- UNTDID (UN/EDIFACT) - https://bitbucket.unece.org/projects/TRADE/repos/untdidservice/browse
Repository GUI
- Sourcetree - https://www.sourcetreeapp.com/ or local SourceTreeSetup-2.6.9.exe
- Prerequisit to install Sourcetree is MS .NET Framework 7.4.1
- Web Installer - https://www.microsoft.com/en-us/download/details.aspx?id=56115 or local NDP471-KB4033344-Web.exe
- Offline Installer - https://www.microsoft.com/en-us/download/details.aspx?id=56116
Pipeline Web interface
- UNECE Bamboo - https://bamboo.unece.org
- Trade Pipelines - https://bamboo.unece.org/browse/TRADE
- UN/CEFACT Pipeline - https://bamboo.unece.org/browse/TRADE-SU2
- UN/LOCODE Pipeline - https://bamboo.unece.org/browse/TRADE-SL
- UNTDID (UN/EDIFACT) Pipeline - https://bamboo.unece.org/browse/TRADE-SU
Working with Git
Official Sourcetree documentation
- Install Sourcetree https://confluence.atlassian.com/get-started-with-sourcetree/install-sourcetree-847359094.html
- Connect your Bitbucket or Github account https://confluence.atlassian.com/get-started-with-sourcetree/connect-your-bitbucket-or-github-account-847359096.html
- Clone a remote repository https://confluence.atlassian.com/get-started-with-sourcetree/clone-a-remote-repository-847359098.html
- Commit and push a change (Git) https://confluence.atlassian.com/get-started-with-sourcetree/commit-and-push-a-change-git-847359114.html
- Pull changes from a remote repository (Git) https://confluence.atlassian.com/get-started-with-sourcetree/pull-changes-from-a-remote-repository-git-847359111.html
Step-by-step guide
Installing and Configuring tools
Sourcetree Initial configuration
- Download and install Sourcetree, if needed install also MS .NET Framework 7.4.1, as this requires Administrator privilegies, ask ISU for assistance
- After Installation run Sourcetree application
As part of initial execution, configure Sourcetree - useraccount and tools
- Login to remote Repository
- Authenticate user (using Windows / Active Directory credentials)
- If Credentials are correct, you should see confirmation
- Select modules for installation (we need only Git)
- Module installation - progress
- Module installation - confirmation
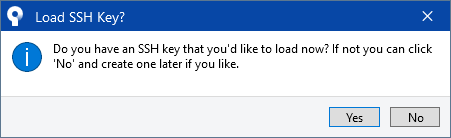
- SSH key configuration (can be skipped)
- Login to remote Repository
- After Initial setup we configure and clone repositories
- Add a new repository
- On remote server, click "Clone in SourceTree" for easy configuration, or copy repository link (for Git repositories the link ends with .git)
- Review Cloning configuration, select local folder where files shoud be stored
- Run Clone and wait for process to finish


Cloning Repository
Commiting and Pushing changes to Repository
Running Pipelines
From repo to Stage
From Stage to Prod
86 this section
Prerequisities
Step-by-step guide
Related articles
This page has no comments.